Now that she’s out for her grand debut as an honest-to-goodness pattern, I thought I’d offer up Pomander for a closer inspection today.
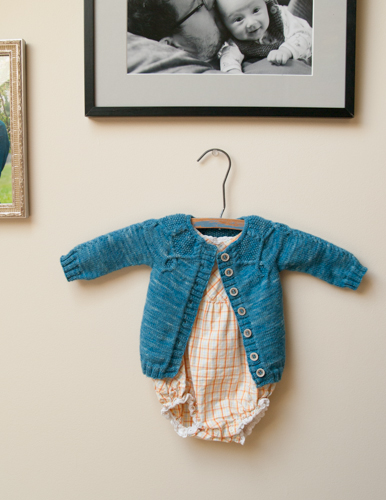
No sooner had the pattern gone live on Ravelry than a savvy would-be customer pointed out I didn’t have a full-length, unmodeled photo of the cardigan to give an accurate overall view. Rectifying this quickly became this morning’s task. (Right after wrassling PayPal to confirm my bank account… which is going to take a couple of days for my small, local bank, apparently. It’s a brave new world with these paid patterns, I tell you.) This is the best light available in my house, I’ve decided. We get direct sun only in the dining room; at this time of year it doesn’t advance past the window seat. I sometimes shoot small items lying flat there (see the last photo in this post), but the bay window isn’t deep enough to hang even a small sweater on the wall without the sleeves projecting beyond, and then you get a messy background with window sash in one direction and living room color/clutter in the other. Upstairs, though, we’ve got a north skylight that yields a soft, diffuse light perfect for photography if your model doesn’t mind sitting on the dog crate. And in this case, Pomander is small enough to be tacked straight to the wall.
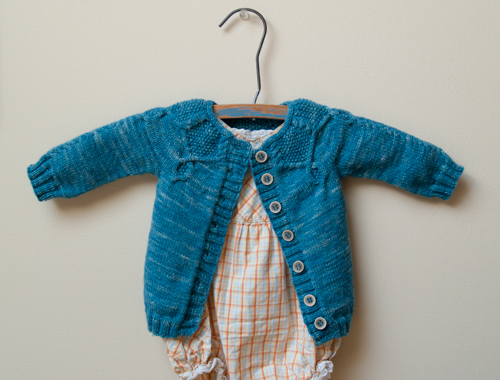
There she hangs, with her details on display: ribbed hem, cuffs, and button band; i-cord bind off at the neck; subtle cable (optional) down the sleeves; and of course that swagged yoke with cables against a seed-stitch background. Full disclosure: I did not knit this pretty, sky blue sample. For that we thank Desirae Khouma, my awesome test knitter who just happens to live two neighborhoods over. Desirae was not only willing to meet up in person to show me her progress but also knit the yoke about three times in all, helping me to get those cables exactly right.
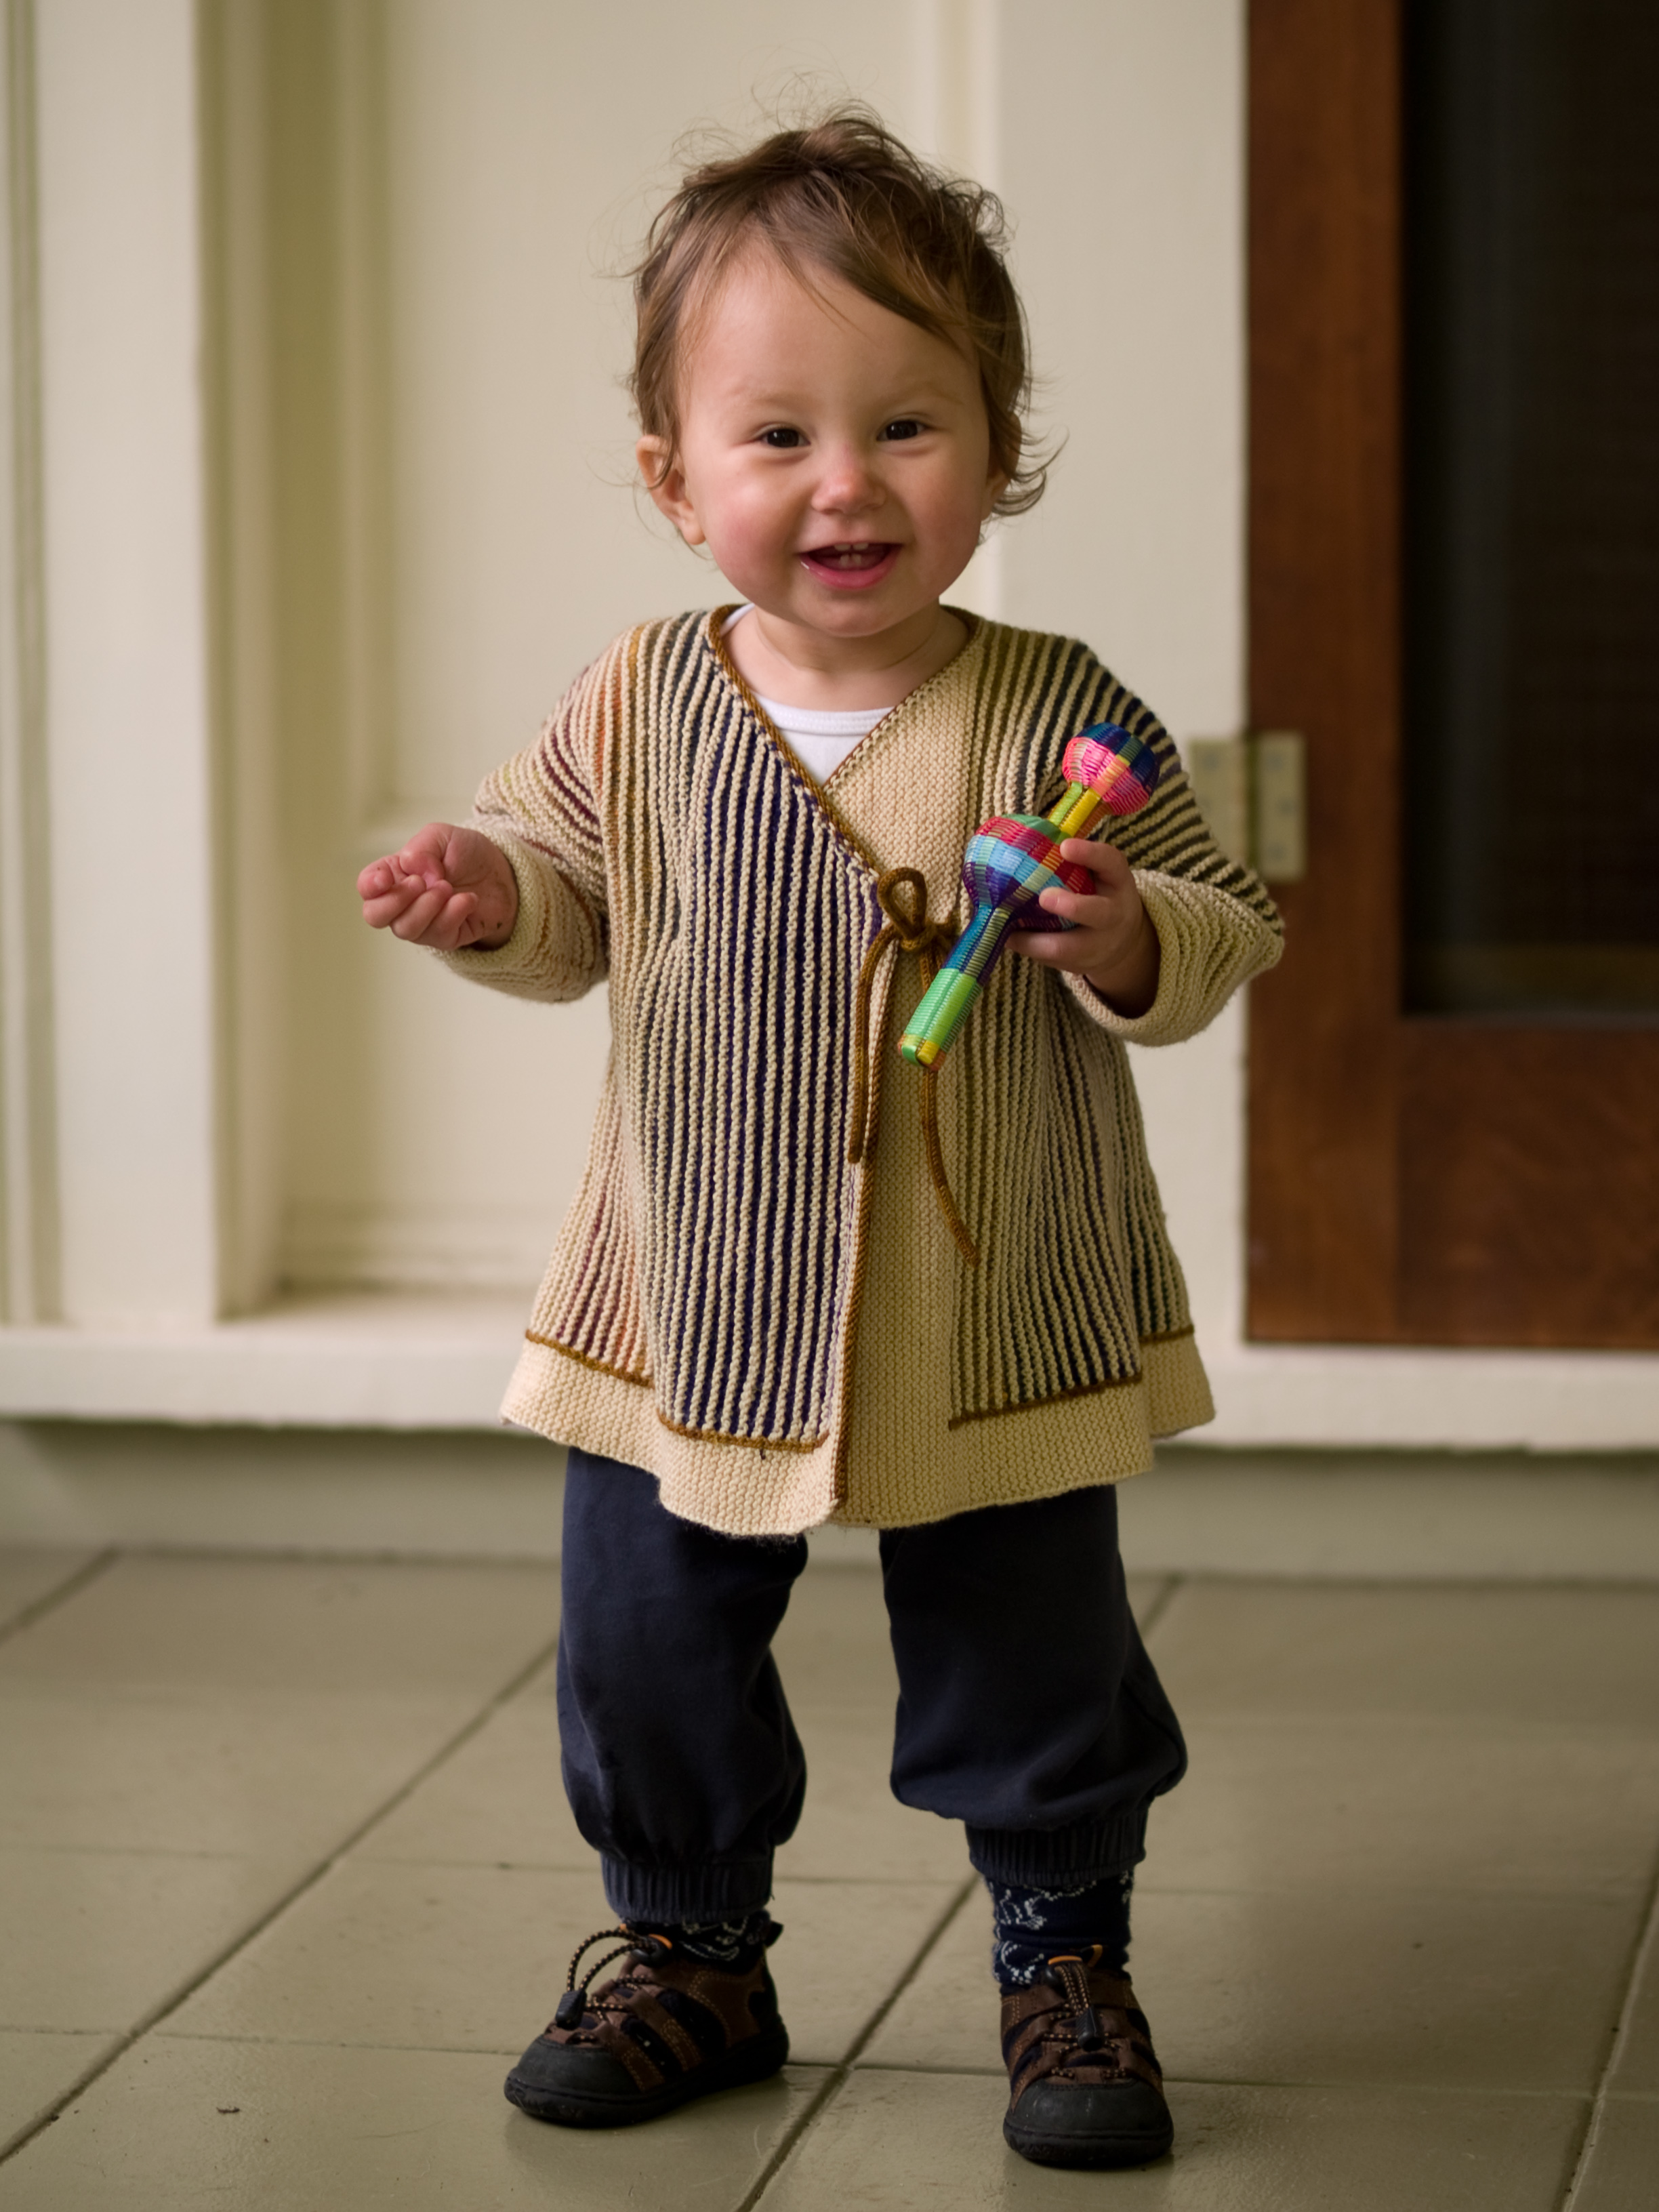
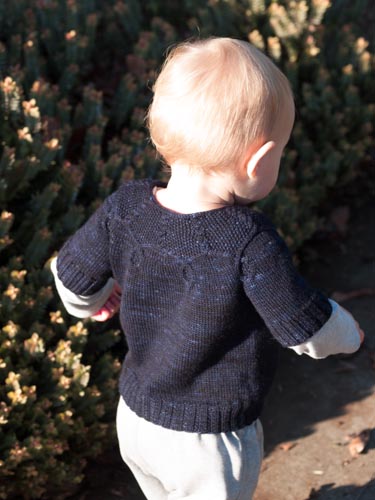
It’s a funny thing about translating a design from your head to paper to wool: sometimes the nature of knitted fabric and even of different yarns will toss you into the rapids as you try to paddle toward that initial vision. I knit the prototype for Mia’s Margaret in a softly spun two-ply BFL with quite a bit of halo. It looked like this:

(Okay, a good deal of that “halo” is wiggly six-month-old action, but check out the fabric on my home-page banner and it’s plain that the yarn itself was also fuzzy.) Notice that the vertical cables running up to the neck line read distinctly against the seed stitch. I had placed decreases on either side of each cable to nibble away my seed stitch ground between. In this yarn, it worked just fine. But Desirae and a couple of my other testers were working in sock yarns that were more tightly spun, smoother, and multi-plied, and they ran into a problem: as you decrease in seed stitch, you inevitably break its tidy checkerboard of knits and purls. You can’t avoid creating little columns or patches of stockinet above or beside the decrease. And when that column or patch is beside a cable, the cable seems to melt into the ground or looks oddly wider for a few rows. In sock wool, this effect was quite visible and detracted from the clean lines of the motif. This might not have bothered every knitter, but it bothered me and Desirae. After a lot of chat back and forth, we arrived simultaneously and independently at the same solution: couldn’t the decreases be somehow placed within the cable itself, where they could vanish entirely? They could, and it was easy enough to do in terms of yarn maneuvers—no more difficult than the five-stitch cables that become seed stitch to form the swags, certainly. It took me a day or two of head-scratching to figure out how to chart those decreasing cables, though. Then patient Desirae knit the yoke again from the resulting chart to make sure it was doable by someone other than the designer. I’m pretty chuffed about the little suckers, as it turns out.
A note on Pomander’s construction, which is unusual: it’s knit from the bottom up in one piece, but then stitches are cast on provisionally for the sleeves and yoke so you can work the yoke before picking up stitches to work the sleeve down toward the cuff. The pattern contains a link to an invisible provisional cast on tutorial, my favorite because it doesn’t require a crochet hook or a second needle or any extra materials but a length of waste yarn. Why not just go the traditional route of knitting the sleeves from the cuff up to the underarm and then uniting them to the body before working the yoke? Well, you can if you want to. But me, I’m eager to get to the fun part after all that stockinet in the body. And also, I tend to be cavalier about yardage requirements. This means I sometimes run out of yarn. Sometimes I know I won’t have enough, but I’m too stubborn to give up the dream of this yarn as this pattern. My answer is short sleeves, worked last of all. And if you can work the sleeves top down, there’s no guessing or nail-biting or wasted yarn into the bargain. In fact, I am knitting Jolyon an 18-month Pomander that will probably be entirely sleeveless:
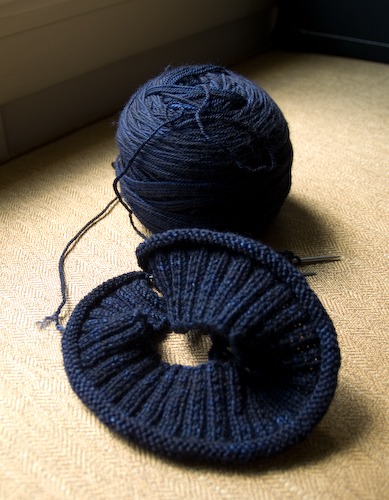
This is Knitted Wit Cashy Wool in the gobsmackingly gorgeous Prussian Blue. There was only one skein in the shop, and that skein is 400 yards. The 18-month size calls for 600 yards, which I calculated generously to allow swatching, but still… no way am I getting full sleeves. I’m ready to start the yoke now. And I really think a sleeveless version is going to be pretty cute and practical for the Northwest summer.
If you’re inspired to cast on a Pomander, you can get the pattern by clicking the payment button in the sidebar (it will take you to PayPal) or by visiting the pattern page on Ravelry. Any questions? Please, please get in touch right away! I want my patterns to be fun — challenging, perhaps; educational, I hope; but fun for sure — to knit. Pomander has a lot going on, especially for such a small garment, but I think the adventurous intermediate knitter can do it all and I am more than happy to help. I think bravery is one of the best qualities in a knitter, or in anyone trying to learn and improve any skill. I’ve tried to pack in as many helpful tips and tricks as I could because I always like it when a pattern teaches me a new technique I can apply to future projects. Yes, you will have to work from a chart. The pattern does not include line-by-line instructions for the yoke motif. But every symbol is fully explained in the key. (I must say I don’t understand the aversion to charts that some knitters profess… working only from line-by-line written instructions is like shunning a nice clear accurate road map in favor of rambling directions from the guy at the gas station. If you’re one of those knitters, I do respect that not everyone’s brain works the same way and I’m truly sorry to be excluding you at present. If I get a lot of requests for written instructions I will see if I can write up an extra page to translate the charts into English. I just fear introducing errors in the process, since it’s so much harder to spot an omission or typo that will throw off the whole pattern.)
Happy knitting!

I’m expecting my first, and was on Ravelry earlier today and saw it and had already faved it. It is beautiful!
Beautiful!
This is a lovely pattern. My sister just had a little baby boy (his name is Joss and he’s a cutie pie) and what I love about this pattern is that it is truly gender neutral whilst also being really beautiful and not boring. I look forward to making this for my little nephew, probably in green coz that’s my sis’ fav colour. Thanks for being such a great designer and blogger and person. Kudos on a fab design.