Baerlic Vest Dip Clusters Video Support
This video demonstrates how to work the dip stitch clusters in my Baerlic vest, published with Hinterland Textiles in September 2022. For the left half of the cluster, some testers found it was more comfortable to make the dips with the left needle tip—experiment on your swatch and feel what’s right for you. You can also opt for a crochet hook if you prefer. Whichever tool you use, be sure to keep the tension loose enough that the dip clusters won’t pucker the fabric.
Wildcraft Brioche Bract Video Support
These videos may help knitters navigate the trickiest bits of my Wildcraft wrap, published by Quince & Co. in January 2021. Let’s begin with Row 10 of the Brioche Bract motif, a WS row that involves quite a lot of slipping stitches with yarn in various positions to set up the decreases on Row 11:
The second video shows the approach to the next of the bract panels so you can see the moves one more time. And then let’s take a look at Row 11 (RS), where the decreases restore the original stitch count and set up basic brioche fabric again:
Please don’t hesitate to write with any questions you may have. Thanks to my ten-year-old for the videography. These images were taken at the Twisp River on Okanogan and Methow lands.
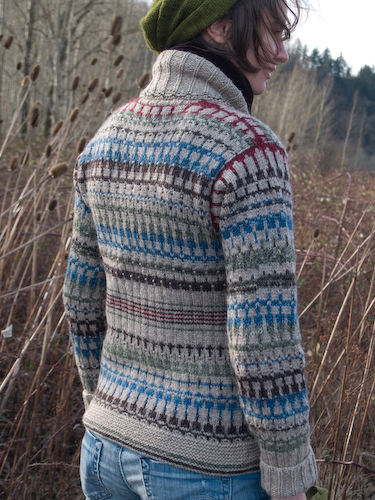
Anna Zilboorg’s Perfect Buttonholes
I learned to work these pure-genius buttonholes from Anna Zilboorg at Sock Summit 2011 and couldn’t be satisfied until I’d deployed them in a design of my own; they form the perfect polished closure for my Winter Garden jumper. The technique makes them the most complicated buttonholes I’ve ever worked, but the result is a stable, self-faced button band of stockinet fabric with astonishing tubular openings for the buttons—perfect is truly an apt descriptor. Although the directions are quite involved, they can be accomplished by any knitter familiar with grafting, or Kitchener stitch. Interweave Knits offers a video tutorial with Anna herself for $4.99, which I’m sure is money well spent. (And I hope Anna is getting a share of the profits by the download!) I never wish to undercut any designer’s work and so I won’t be posting a video of my own. But I know Anna wants more knitters to know about her innovation and hope she’ll not mind if I post some photos of my own button band process that will support your work through the particulars of the technique as used in Winter Garden. I’m going to assume you’ve got the Winter Garden pattern in hand or a copy of Anna Zilboorg’s Knitting for Anarchists, in which she first imparted this piece of wizardry. To keep this tutorial general, I won’t give stitch counts except as regards the buttonholes themselves. All the photos in this tutorial will get bigger if you click them.
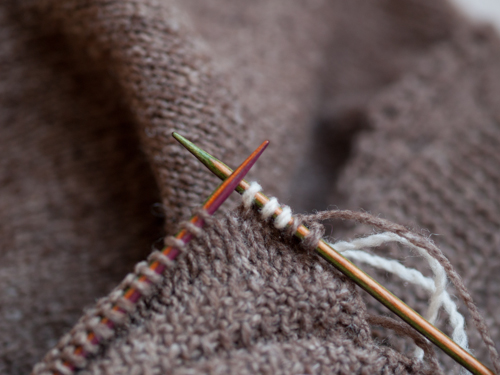
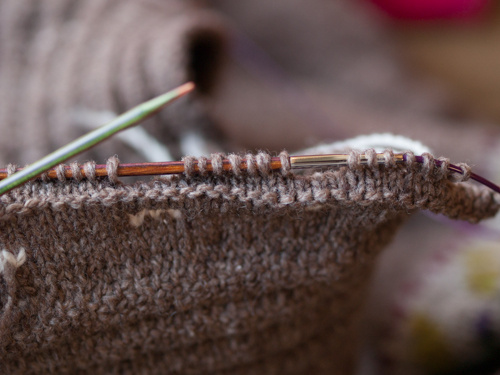
We’ll begin with stitches picked up along the edge where you’re going to work the button band. You’ve worked three rows of stockinet (purl a row, knit a row, purl a row) on these stitches and you’re ready to do the row that establishes the buttonholes. Having knit to the position of the first hole, you work three stitches in waste yarn—that’s the white yarn you’ll see below:
 Those waste yarn stitches get slipped back to the left needle. Here they go:
 Now you knit them again with the main yarn:
 … and continue on to the next buttonhole, and then the next.
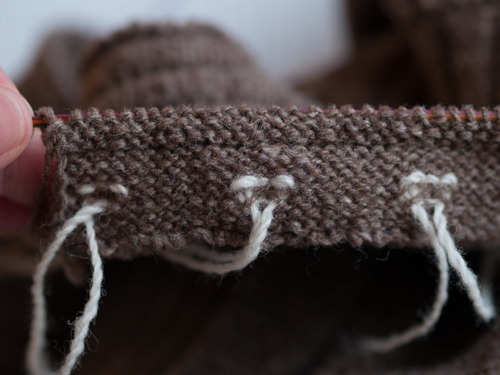
That’s all the fancy business for this row. Now you work three more stockinet rows, a turning row in reverse stockinet that will become the edge of the band, and three more rows of stockinet. Your work looks like this on the right side:
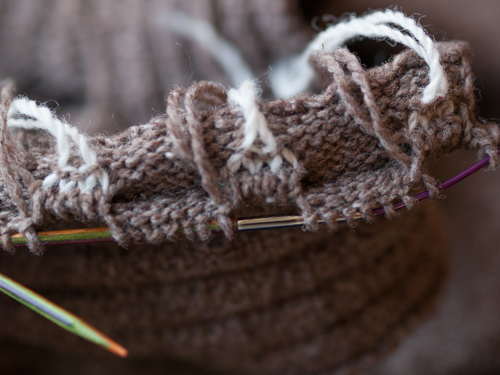
 … and like this on the wrong side:
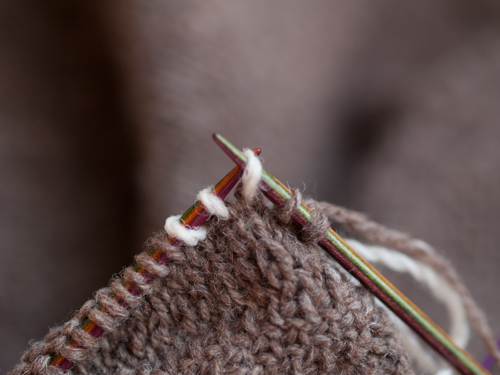
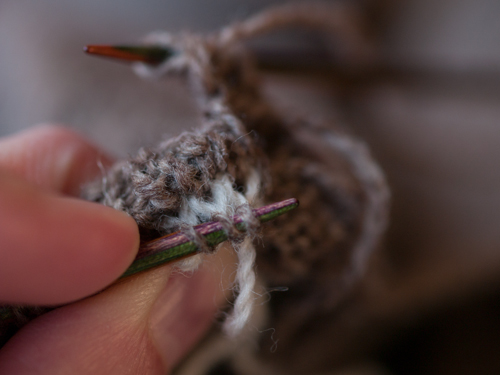
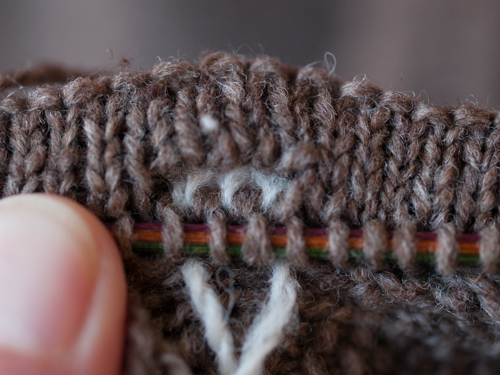
You’re ready for the hard part. You break the working yarn, leaving a 6″ tail to do the graft. Now look at the wrong side of the band. With a small double-pointed needle, you pick up the four purl bumps through which the waste yarn travels above where the hole will be. Here’s how those bumps will look once they’re on your dpn (the pinky-purple needle my thumb is holding in place):
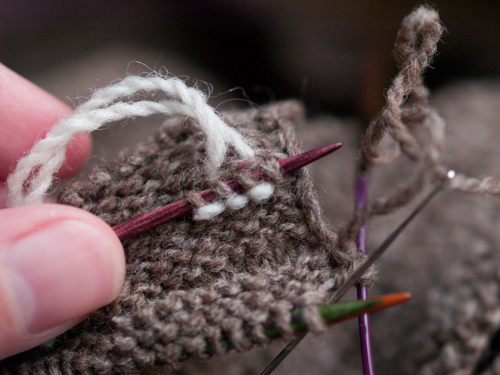
Note that you’re picking up four bumps even though only three stitches are being grafted for the buttonhole. That’s important, because you’ve got to unite the grafted stitches to their ungrafted neighbors on either side of the buttonhole. Otherwise you’ll end up with holes that aren’t buttonholes and aren’t at all perfect. Cluttering up this picture are the purple cord of my working circular needle—I’ve pulled the unused end of the needle through to let the live stitches before the buttonhole hang out somewhere secure so I don’t have to worry about dropping them while I’m busy with the grafting—and the silver darning needle, which I’ve already threaded with the 6″ tail. Now bring the dpn (purple) and the working needle (striped) together and begin to graft. Take the threaded darning needle and bring it back to front (purlwise) through the first stitch on your working needle, like this:
(I switched darning needles on you. Sorry about that. The smaller eye of the silver one was giving me fits.)
*Bring the darning needle back to front (purlwise) through the first purl bump on the dpn. Drop this bump off the dpn and thread the darning needle front to back (knitwise) through the second purl bump on the dpn. Leave this bump on. Now take the darning needle knitwise through the first stitch on the working needle and drop that stitch off. Go purlwise through the next stitch on the working needle and leave it on. Repeat from *, continuing to graft until no bumps remain on the dpn. (If you need some video help to brush up on grafting, try knittinghelp.com.)
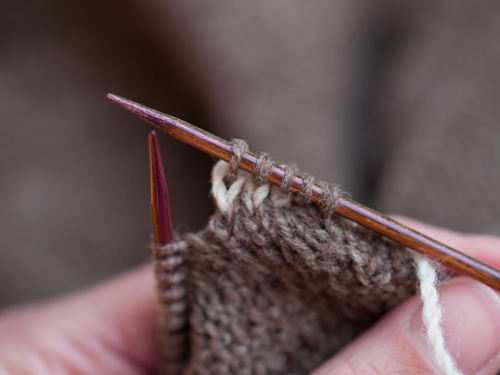
Abandon the cut tail of yarn and rejoin your ball of main yarn to knit to the next buttonhole. This is what your work should look like now:
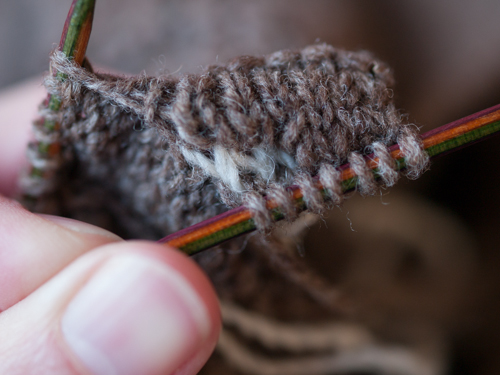
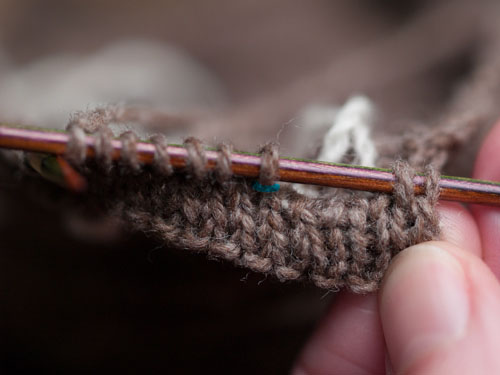 Did it seem confusing that you were apparently grafting four stitches on the dpn to three on the main needle? If you click this photo bigger, you can see that I’ve highlighted at the base of the stitch to the left of the hole in turquoise. That’s to show where the grafting tail traveled through this stitch just before I dropped the last purl bump off the dpn: the three grafted stitches are thus linked to their ungrafted neighbors and there won’t be any funny business with gaps in the fabric. The stitch with the turquoise necklace is the first of the stitches that get knit on the way to the second buttonhole, though—don’t slip it or drop it off, okay? Here’s a nice row of future buttonholes from the right side:
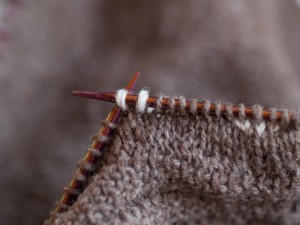
 … and from the wrong side:
 I know, that’s terrifying. All those ends! All that waste yarn mayhem! Don’t panic. Having knit and grafted and knit to the end of the row, we flip around to the wrong side. Purl to the first buttonhole. With your left needle, pick up the 3 purl bumps beneath the waste yarn:
… purl them:
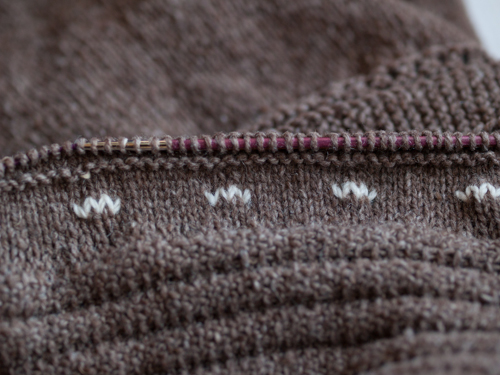
… and continue in purl to the next buttonhole, where you’ll pick up the three bumps and purl them, and so on to the end of the row. Here’s how the facing looks now:
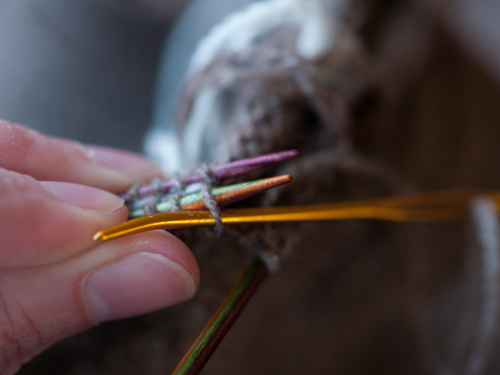
Work two more rows of stockinet—now the facing is the same height as the band—and bind off on the right side. Turn work to the wrong side. At the one edge of each buttonhole are two ends of the main yarn:

(Sorry I missed the mark a bit with the depth of field in that shot. But I think you can still see I’m holding the two ends in question coming from the right edge of the hole.) Gently snug them up so there are no loose stitches, tie them together in a square knot and cut them, leaving ends about 1” long. Pick out the scraps of waste yarn and admire the tidiest buttonholes that ever were. You may hear angels singing.

Then sew down the facing to the wrong side of the bodice, neatly sandwiching and concealing all those pesky knotted ends. There are a number of ways you can do the sewing, but I use a simple whipstitch through one leg of the bound-off stitch and one leg of a stitch from the bodice fabric:

I picked the knit column because it’s easy to see that you’re always going into the same column and because it’s one stitch farther into the garment from the point where I picked up for the button band, which helps the band not to flip outward.
And that’s all, folks! Please contact me if you’re still confused about any part of this process. I hope you love your perfect buttonholes!